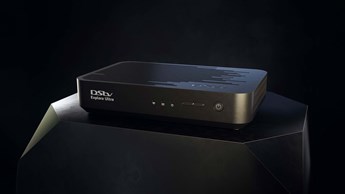
A whole new world of entertainment is waiting for your when you connect your DStv Explora to the internet.
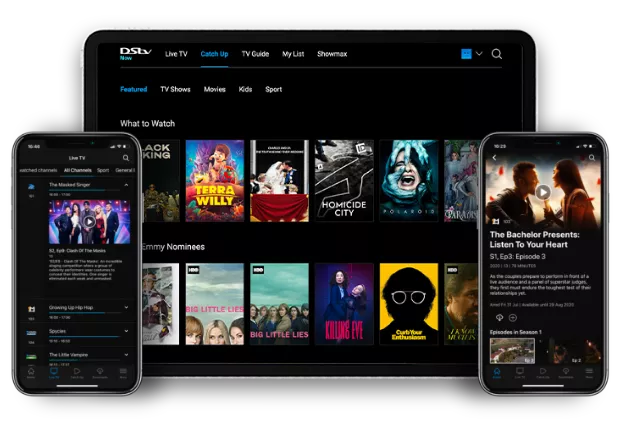
Your DStv Explora offers you so much more-a when you connect it to your home internet. You’ll be able to stream series not just from DStv but from Showmax, too. You’ll be able to watch the latest episodes of your favourite new shows on Catch Up, as well bingeing complete Box Sets of some fantastic new series. You can also set your decoder to remember and record series while you are away.
A Wi-Fi cable router with unlimited internet connection A minimum 2Mbps in connectivity speed is required for downloads or remote recording For SD viewing, a minimum of 4Mbp is required For HD viewing (and the best experience), a minimum of 10Mbps is recommended
An Ethernet cable OR (if your router is in a different room to your Explora)
a DStv Wi-Fi Connector and docking station OR
a DStv Wi-Fi Connector, a router with WPS, and Wi-Fi Connector power cable OR
a DStv Wi-Fi Connector, a router without WPS, your laptop, and Wi-Fi Connector power cable
Connect using an Ethernet cable
If your Explora is in the same room where you have your house’s router, you can connect the 2 directly using an Ethernet cable (which you can buy from computer, electrical and telephonic retailers). This is the most stable option as your other home Wi-Fi, Bluetooth and other smart devices won’t interfere with your connection.
Make sure that your router is switched on and connected to the internet.
Switch your TV on.
Plug one end of the Ethernet cable into the clearly marked Ethernet port (the green one) at the back of your Explora.
Plug the other end of the Ethernet cable into any of the Ethernet ports at the back of your router.
Check whether the connection is working by selecting the help button on your remote control (bottom right hand side).
This will bring up a menu, select Tools, and then Connectivity Checker and press OK (centre of your remote control).
Your TV screen should show green check marks next to both the router connection successful and internet connection successful options.
Now select and switch on the connected services that you would like on your Explora (the default setting is for Connected Services to be Off).
Press the big blue DStv button on your remote.
Navigating the menus via your TV screen, select Settings, then User Preferences, then Connected Services.
Now select which services you want on, and which you want off. Hovering over each option will bring up a short explanation of what the service will do).
And voila! You’re ready to enjoy lots more DStv.
Connect your Explora to the internet using a DStv Wi-Fi Connector with docking station
WPS (Wi-Fi protected setup) is an option if your Explora and your router are going to be in different rooms in your house, or they are too far apart for your Ethernet cable to reach. You will need a DStv Wi-Fi Connecter and docking station (which are separate from your Explora).
Check that your router is switched on and connected to the internet.
Switch your TV on and keep your remote control at hand.
Place your Wi-Fi Connecter docking station alongside your Explora (not on top of it).
Insert the power cable attached to your Connector’s docking station into either of the USB ports on the back of your Explora.
Insert the DStv Wi-Fi Connector into its docking station.
When the 2 are connected, the power indicator on the front of the Connector will glow white.
The Connector should automatically launch the connectivity setup wizard, which will search for all available Wi-Fi networks.
Use the arrow keys on your DStv remote control to scroll down to your preferred Wi-Fi network and press OK in the centre of your remote control to select that option.
Then press OK again to connect your Explora to this network.
If your password is required, you can use the number & letter pad on your remote control to enter it, or press ALT on your remote to switch to the onscreen keyboard.
Once your password has been confirmed, your Explora will connect to the internet and automatically test your connectivity.
Now select and switch on the connected services that you would like on your Explora (the default setting is for Connected Services to be Off).
Press the big blue DStv button on your remote.
Navigating the menus via your TV screen, select Settings, then User Preferences, then Connected Services.
Now select which services you want on, and which you want off. Hovering over each option will bring up a short explanation of what the service will do).
And voila! You’re ready to enjoy lots more DStv.
Connect your Explora to the internet with WPS
WPS (Wi-Fi protected setup) is an option if your Explora and your router are going to be in different rooms in your house, or they are too far apart for your Ethernet cable to reach. You will need a DStv Wi-Fi Connecter (which is separate from your Explora)
Check your router for a WPS button. If it does have 1, then this is an option that’ll work for you. If not, you’ll need to use one of the other methods described on this page.
Place your Wi-Fi Connecter alongside your Explora (not on top of it).
Insert the power cable that came with your Connector into either of the USB ports on the back of your Explora.
Plug the other end of the cable into the power input on the back of the Connector.
When the 2 are connected, the power indicator on the front of the Connector will glow white.
Now press the WPS button on your router.
Then press the WPS button on the Connector.
Wait 2 minutes.
You should see the Wi-Fi indicator on the front of the Connecter start to flash before settling in to glow solid white once an internet connection has been established.
Now plug the Ethernet cable into the Ethernet port on the back of your Explora.
Plug the other end of the Ethernet cable into the Ethernet port on the back of your Connecter.
Check whether the connection is working by selecting the help button on your remote control (bottom right hand side).
This will bring up a menu, select Tools, and then Connectivity Checker and press OK (centre of your remote control).
Your TV screen should show green check marks next to both the router connection successful and internet connection successful options.
Now select and switch on the connected services that you would like on your Explora (the default setting is for Connected Services to be Off).
Press the big blue DStv button on your remote.
Navigating the menus via your TV screen, select Settings, then User Preferences, then Connected Services.
Now select which services you want on, and which you want off. Hovering over each option will bring up a short explanation of what the service will do).
And voila! You’re ready to enjoy lots more DStv.
Connect your Explora to the internet without WPS
If your router does not have WPS (Wi-Fi protected setup) but you do have a DStv Wi-Fi Connector, you can still get your Explora and router chatting. Got your laptop handy? Good, let’s go.
Place your Wi-Fi Connecter alongside your Explora (not on top of it).
Connect one end of your power cable to your laptop USB port and the other end into the power input on the back of the Connector.
Insert one end of your Ethernet cable into the Ethernet port on your laptop and the other side into the Ethernet port at the back of the Connector.
Select your specific router from the list of options given, enter your Wi-Fi password if any and then press connect.
Once connected, you can unplug the Connector from your laptop.
Insert 1 side of your Ethernet cable into the green Ethernet port of the DStv Explora decoder, and the other end into the Connector’s Ethernet port.
Insert 1 end of the power cable into either of the USB ports on the Explorer, and the other side into the power input of the DStv Wi-Fi Connector.
When the 2 are connected, the power indicator on the front of the Connector will glow white.
Wait 2 minutes.
You should see the Wi-Fi indicator on the front of the Connecter start to flash before settling in to glow solid white once an internet connection has been established.
Check whether the connection is working by selecting the help button on your remote control (bottom right hand side).
This will bring up a menu, select Tools, and then Connectivity Checker and press OK (centre of your remote control).
Your TV screen should show green check marks next to both the router connection successful and internet connection successful options.
Now select and switch on the connected services that you would like on your Explora (the default setting is for Connected Services to be Off).
Press the big blue DStv button on your remote.
Navigating the menus via your TV screen, select Settings, then User Preferences, then Connected Services.
Now select which services you want on, and which you want off. Hovering over each option will bring up a short explanation of what the service will do).
And voila! You’re ready to enjoy lots more DStv.
Feel every moment with DStv
New to Catch Up this month
07 July 2021
DStv’s Catch Up service offers you TV in your own time, and there’s so much more to see on all packages this month.
Afrokaans Film & Television (Survivor SA) is producing the 12-episode Showmax Original, which is expected to premiere in the first half of 2021. Add Showmax to your DStv bill to stream it first.
Sign up for DStv – it’s an online streaming service for all DStv subscribers. Watch the channels you watch on your decoder at home, on the Internet! Go to now.dstv.com on your laptop and Catch Up on the episodes you missed.